The final project for this course will be the creation, building and programming a robot. Its function is to be controlled by voice commands and to order him to follow an object or person.
For the development of the project will use an
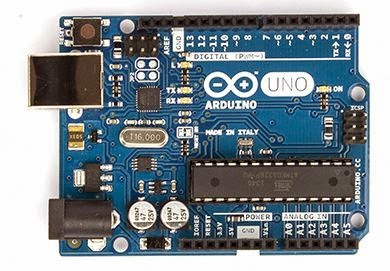
Arduino Uno R3 as robot controller due to its affordability and versatility in controlling analog and digital I / O thanks to their
open source IDE.
More Information
For the movement we use four DC motors controlled by an
Dual H Bridge DC Stepper Motor Drive Controller Board módulo Arduino L298N , 11,1v supplying it through a battery powered motors A and B with + -9V and stabilizes output 5v for other connections.
Datasheet
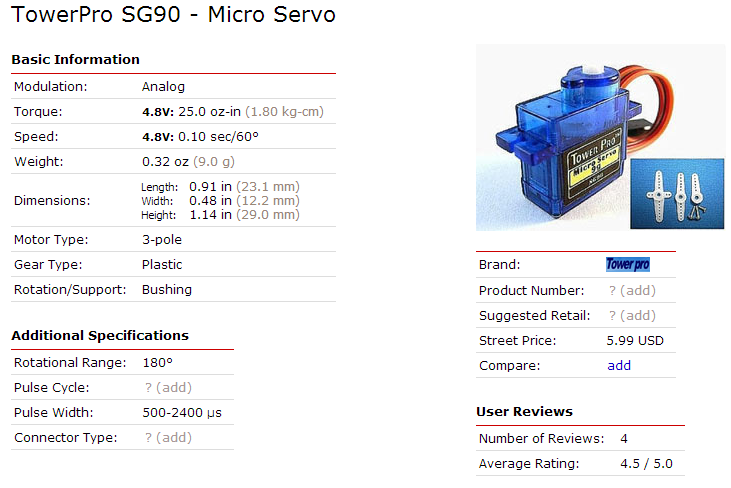
As the servo responsible for performing the action of looking through constant circular motion of 180 degrees, and the ultrasonic sensor responsible for detecting and perform distance measurement.
To interconnect the entire Sensorica use Arduino Sensor Shield V4.0 allowing you to connect your Arduino and / or compatible boards to modules like sensors, servos, relays, buttons, potentiometers etc. quickly and easily.
It has analog / digital inputs with VCC / GND, 13 digital ports ready for use with sensors or servos with VCC / GND / Digital IO port., 6 analog ports prepared VCC / GND / Analog IO. and communication port with I2C and UART possibility. Operating Voltage: 5V. DC Input Voltage (recommended): 7-12V. DC Input Voltage (limits): 6-20VDC.
Applied to our robot, we use it to connect the servo (Pin 8 data, vcc and gnd), ultrasonic sensor (Pin 11 Echo, Pin 10 Trigger, vcc and gnd) and enable the four engines (Pins 4,5,6 7).
To control the robot using voice commands will use the Arduino Shield EasyVR 2.0
This allows us to train the shield easyvr with our voice and assign a voice command to perform an action, in our case, find an object or moving the robot in all directions by assigning each move to a voice command.
The first step was the creation of the robot, instead use a very complete kit that it included the main structure of the robot and its main sensors. (Buy it in
ElectroSDR or
Dx)
This Robot Kit contain: (Links to Buy it)
-
4 DC motors with their wheels.
-
Dual H Bridge DC Stepper Motor Drive Controller Board módulo Arduino L298N.
-
Microcontroller Arduino Uno R3.
-
Arduino Sensor Shield.
-
Ultrasonic Sensor HC SR-04.
-
MiniServo SG-90.
The structure is formed by two plates methacrylate (perforated for easy cable connections) and copper pillars in between to give it strength.
The bottom of the structure of the robot will be where the four DC motors and their corresponding wheels are placed and the battery conections.
The top will be where the microcontroller (Arduino Uno R3) and voice shield (
EasyVR 2.0) and Sensorica Connection (Sensor Shield V4).
At the front of the servo set to connect the ultrasonic sensor connected to the sensor Shield V4.
At the rear of the switch will be connected to the battery and speaker connected to EasyVR Shield.
After the construction and assembly is the last step of the robot programming using the Arduino IDE based Processing, loading it into the microcontroller board Arduino UNO R3.
More Information
Here you can download the different tests for each of the components (Servo, ultrasonic motors, easyVr) and the code of the final program of the Robot.
Common Errors and Failures in the construction and programming process:
- Unifying the GND of all components to avoid potential differences. (GND battery connected to motor controller and microcontroller).
- check engine and before his placement polarization to rotate in the same sense.
- Replacing wiring and parts (Servo SG90) by wear or breakage in the process of building or testing.
Some pictures of the finished robot:
I hope you liked it, if you have any questions or suggestions write it in the comments area.